
In a startup, where time-to-market is crucial, Continuous Deployment (the ‘CD’ of CI/CD) offers several advantages. It automates the build, test, and deployment processes, reducing the risk of human error and decreasing time developers spend watching a loading bar. It also enables faster iterations: developers can frequently merge code changes, run tests, and deploy them to production with minimal effort. This empowers startups to respond swiftly to market demands and rapidly deliver new features.
As you can tell, I truly believe a good CD pipeline can step change a development teams performance. But how do you get there when you’re starting from scratch? In an environment where every hour of dev time not ‘delivering value’ to users is deemed to be wasted? Simple. By starting small, with a pipeline that you can build and iterate on as your needs grow. In this post, I will walk you through the mobile CD pipeline we built at Prickly Bear. It took us less than 1 day to build and has already saved many times that in developers time. It does 2 things well:
- Automatically builds our Unity project for iOS and Android
- Automatically deploys the builds to the App and Google Play stores
What we use
The CD pipeline at Prickly Bear relies on 2 services:
Codemagic is a cloud-based service (what service isn’t nowadays) designed exclusively for mobile application developers. It greatly simplifies the process of releasing builds of your app and enables us to get up and running quickly.
#Requirements Building Unity apps in a cloud CI/CD environment requires a Unity Plus or a Pro license.
Your project is hosted on a VCS e.g. Github, Bitbucket, Gitlab.
You have created an account with Codemagic.
Steps
In Codemagic:
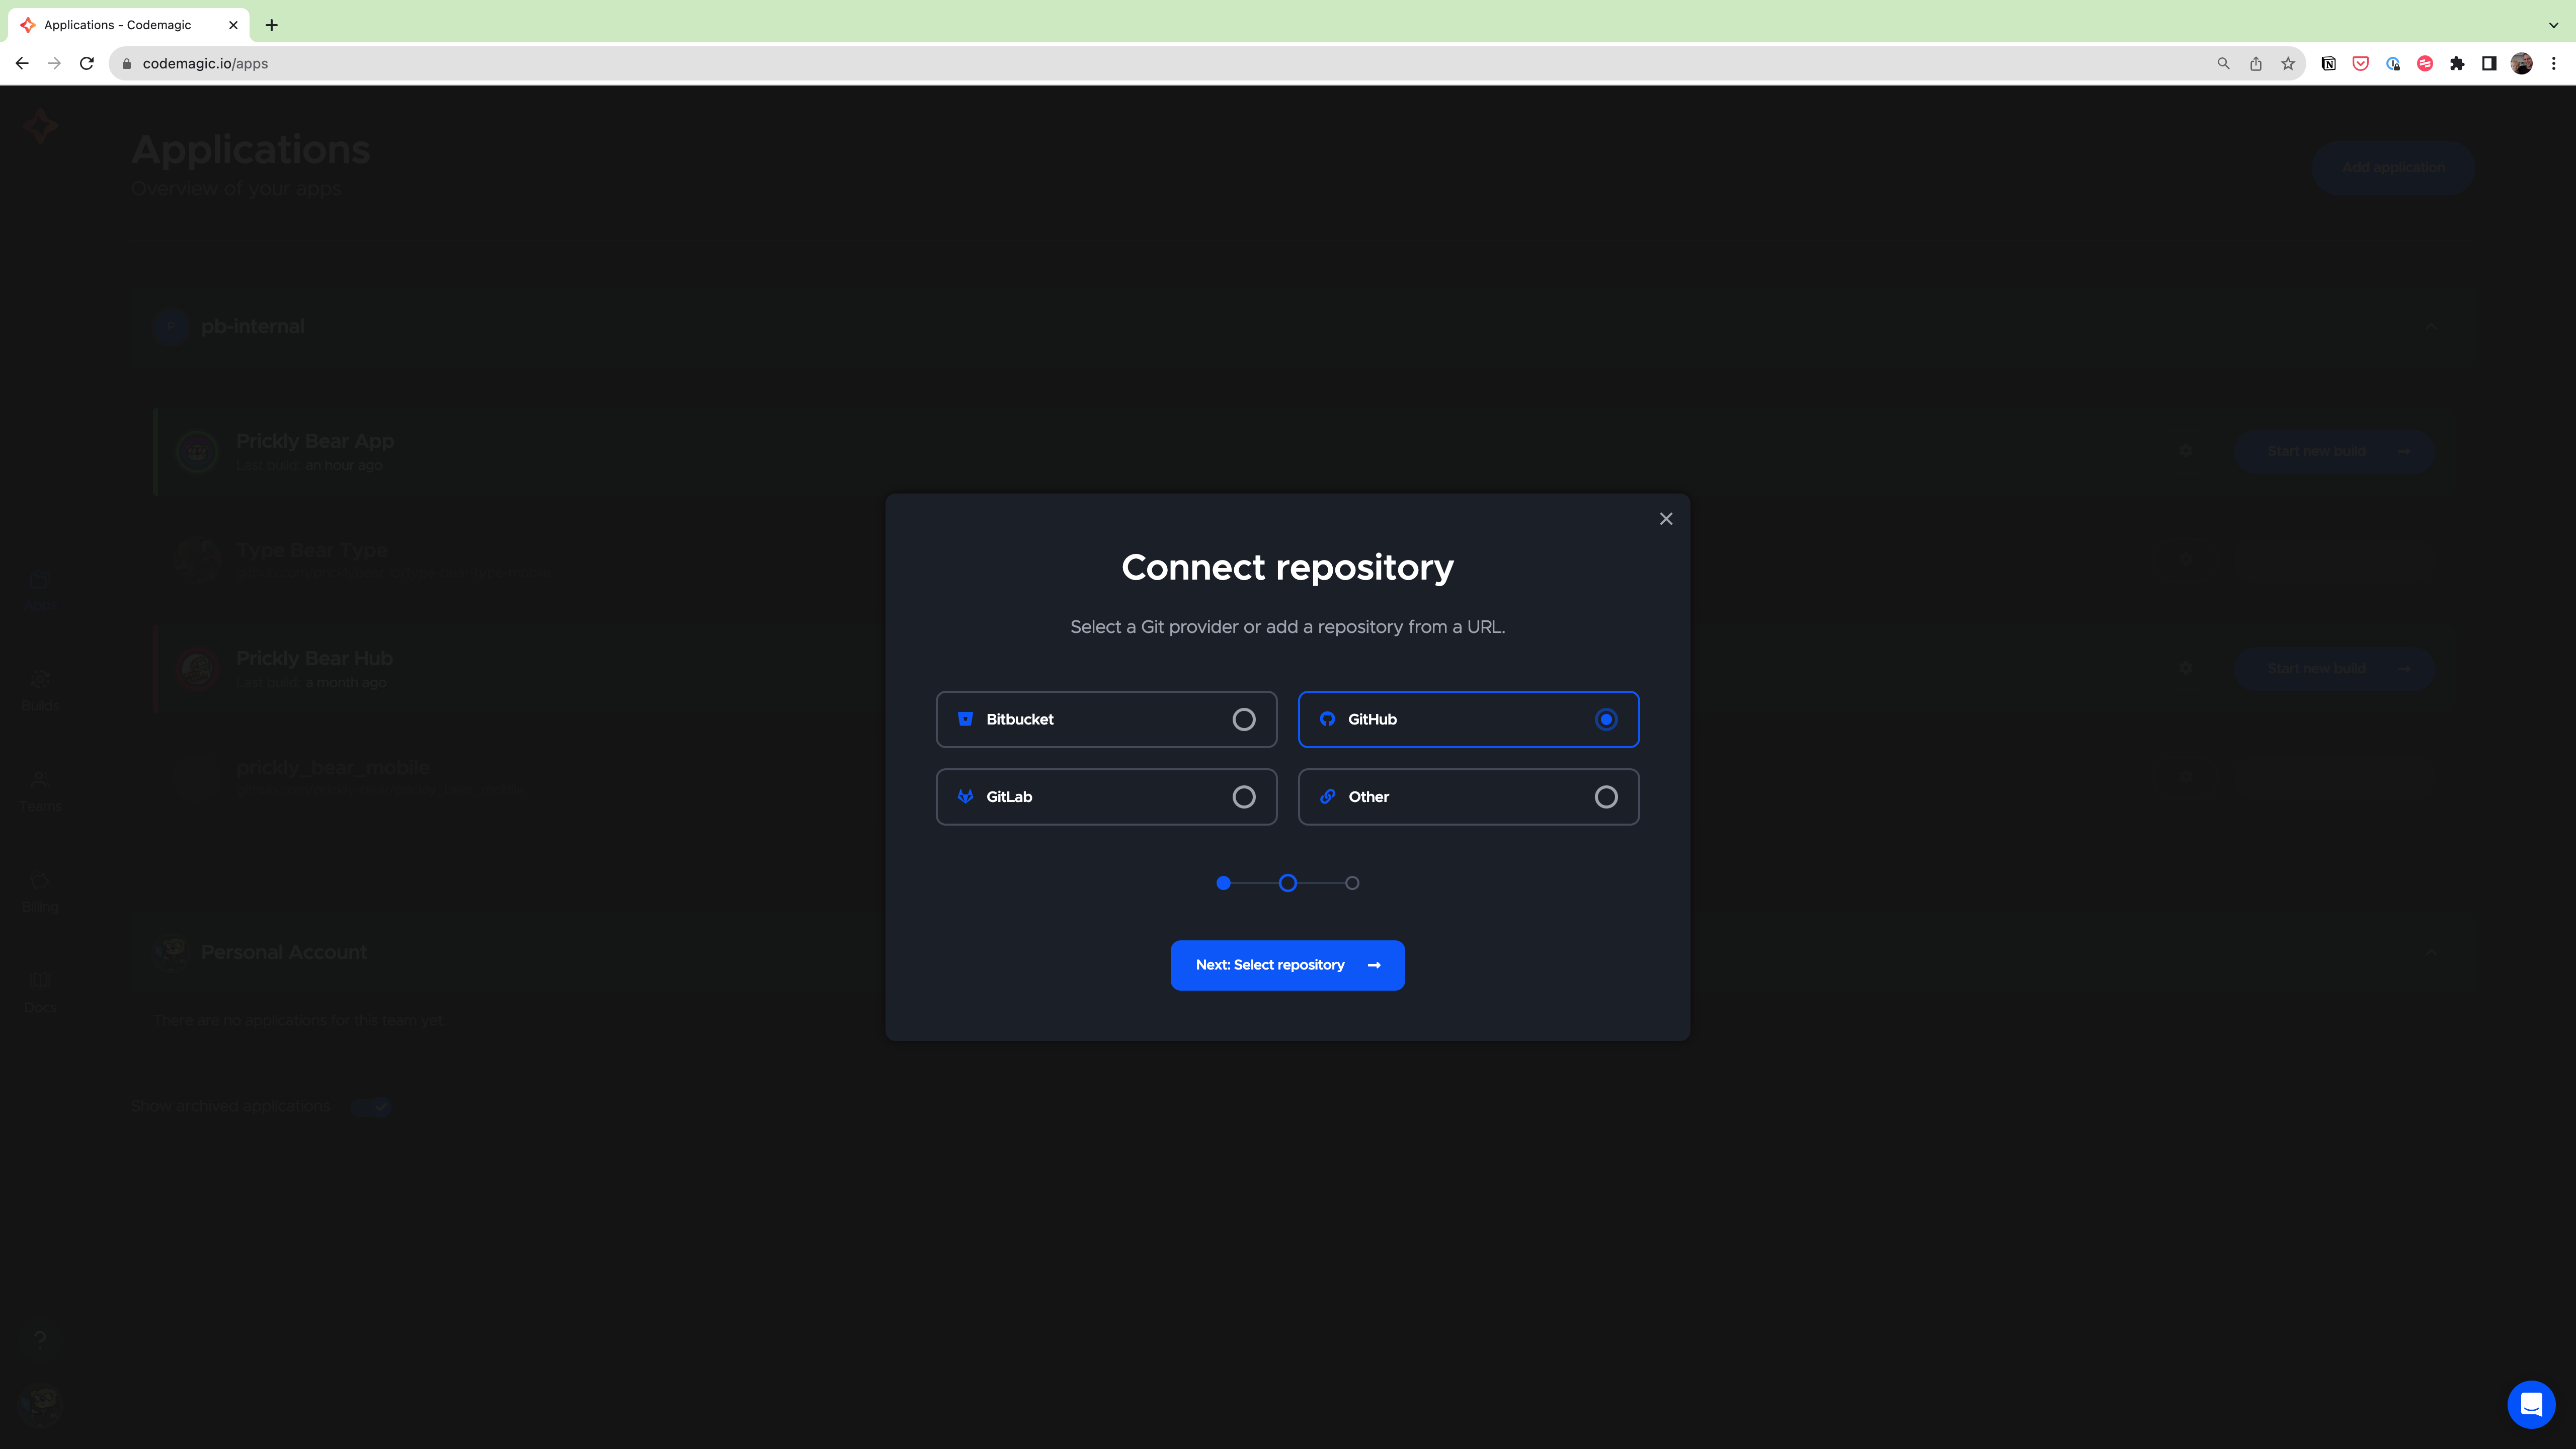
- Connect the repository where the source code is hosted. Detailed instructions here.
- Select the repository from the list of available repositories.
- Select the Unity project type.
-
Click Finish: Add application.
This will link Codemagic with your project.
You now need to tell Codemagic what to do with your project. In your repo:
- Inside the root directory, create a codemagic.yaml file.
-
In the YAML file, specify the build settings for your Unity project. I’ve included our config file below.
 workflows:
 unity-android-workflow:
     name: Android Release Workflow
     triggering:
     events:                       # List the events that trigger builds
         - push
     branch_patterns:              # Include or exclude watched branches
         - pattern: 'main'
     max_build_duration: 120
     instance_type: mac_mini_m1
     working_directory: ./
     cache:
     cache_paths:
         - $CM_BUILD_DIR/Library
         - $CM_BUILD_DIR/Temp
     environment:
     android_signing:
         - app_keystore
     groups:
         - unity
         - google_play
     vars:
         PACKAGE_NAME: “com.companyname.packagename”
         GOOGLE_PLAY_TRACK: internal
         UNITY_VERSION: 2021.3.22f1
         UNITY_VERSION_CHANGESET: b6c551784ba3
     scripts:
     - name: Install Unity version, build support modules, ndk and jdk
         script: |
             /Applications/Unity\ Hub.app/Contents/MacOS/Unity\ Hub -- --headless install --version ${UNITY_VERSION} --changeset ${UNITY_VERSION_CHANGESET}
             /Applications/Unity\ Hub.app/Contents/MacOS/Unity\ Hub -- --headless install-modules --version ${UNITY_VERSION} -m android android-sdk-ndk-tools android-open-jdk
     - name: Activate Unity license
         script: |
             /Applications/Unity/Hub/Editor/2021.3.22f1/Unity.app/Contents/MacOS/Unity -batchmode -quit -logFile \
             -serial ${UNITY_SERIAL} \
             -username ${UNITY_EMAIL} \
             -password ${UNITY_PASSWORD}
     - name: Set the build number and build the project
         script: |
         export NEW_BUILD_NUMBER=$(($(google-play get-latest-build-number \
             --package-name "$PACKAGE_NAME" \
             --tracks="$GOOGLE_PLAY_TRACK") + 1))
         /Applications/Unity/Hub/Editor/2021.3.22f1/Unity.app/Contents/MacOS/Unity -batchmode \
             -quit \
             -logFile \
             -projectPath ./ \
             -executeMethod BuildScript.BuildAndroid \
             -nographics \
             -buildTarget Android
     artifacts:
     - ./android/*.aab
     publishing:
     scripts:
         - name: Deactivate Unity License
         script: |
             /Applications/Unity\ Hub.app/Contents/Frameworks/UnityLicensingClient_V1.app/Contents/MacOS/Unity.Licensing.Client \
             --return-ulf \
             --username ${UNITY_EMAIL} \
             --password ${UNITY_PASSWORD}
     google_play:
         credentials: $GCLOUD_SERVICE_ACCOUNT_CREDENTIALS
         track: GOOGLE_PLAY_TRACK
         submit_as_draft: false
     slack:
         channel: ‘#slack-channel’ #set slack channel name here
         notify_on_build_start: false
         notify:
         success: true
         failure: true
 unity-ios-workflow:
     name: iOS Release Workflow
     triggering:
     events:                       # List the events that trigger builds
         - push
     branch_patterns:              # Include or exclude watched branches
         - pattern: 'main'
     max_build_duration: 120
     instance_type: mac_mini_m1
     working_directory: ./
     integrations:
     app_store_connect: ci-release-build
     environment:
     xcode: 14.2
     ios_signing:
         distribution_type: app_store
         bundle_identifier: com.companyname.appname
     groups:
         - unity
     vars:
         UNITY_IOS_DIR: ios
         XCODE_PROJECT: "Unity-iPhone.xcodeproj"
         XCODE_WORKSPACE: "Unity-iPhone.xcworkspace"
         XCODE_SCHEME: "Unity-iPhone"
         BUNDLE_ID: “com.companyname.appname”
         APP_ID: 6450217822
         UNITY_VERSION: 2021.3.22f1
         UNITY_VERSION_CHANGESET: b6c551784ba3
     scripts:
     - name: Install Unity version, build support modules, ios
         script: |
             /Applications/Unity\ Hub.app/Contents/MacOS/Unity\ Hub -- --headless install --version ${UNITY_VERSION} --changeset ${UNITY_VERSION_CHANGESET}
             /Applications/Unity\ Hub.app/Contents/MacOS/Unity\ Hub -- --headless install-modules --version ${UNITY_VERSION} -m ios
     - name: Activate Unity license
         script: |
             /Applications/Unity/Hub/Editor/2021.3.22f1/Unity.app/Contents/MacOS/Unity -batchmode -quit -logFile \
             -serial ${UNITY_SERIAL} \
             -username ${UNITY_EMAIL} \
             -password ${UNITY_PASSWORD}
     - name: Generate the Xcode project from Unity
         script: |
             /Applications/Unity/Hub/Editor/2021.3.22f1/Unity.app/Contents/MacOS/Unity  -batchmode \
             -quit \
             -logFile \
             -projectPath ./ \
             -executeMethod BuildScript.BuildIos \
             -nographics  \
             -buildTarget iOS
     - name: Set up code signing settings on Xcode project
         script: |
         xcode-project use-profiles
     - name: Set the build number
         script: |
         BUILD_NUMBER=$(app-store-connect get-latest-testflight-build-number "$APP_ID")
         cd ./$UNITY_IOS_DIR
         agvtool new-version -all $(($BUILD_NUMBER + 1))
     - name: Build the project
         script: |
         xcode-project build-ipa \
             --workspace "./$UNITY_IOS_DIR/$XCODE_WORKSPACE" \
             --scheme "$XCODE_SCHEME"
     artifacts:
     - build/ios/ipa/*.ipa
     - $HOME/Library/Developer/Xcode/DerivedData/**/Build/**/*.dSYM
     publishing:
     scripts:
         - name: Deactivate Unity License
         script: |
             /Applications/Unity\ Hub.app/Contents/Frameworks/UnityLicensingClient_V1.app/Contents/MacOS/Unity.Licensing.Client \
             --return-ulf \
             --username ${UNITY_EMAIL} \
             --password ${UNITY_PASSWORD}
     app_store_connect:
         auth: integration
         #
         # Configuration related to TestFlight (optional)
         # Note: This action is performed during post-processing.
         submit_to_testflight: true
         #
         # Configuration related to App Store (optional)
         # Note: This action is performed during post-processing.
         submit_to_app_store: false
     slack:
         channel: ‘#slack-channel’
         notify_on_build_start: false
         notify:
         success: true
         failure: true )
You should modify:
- pattern: ‘branch-name’. Enter the name of your main branch here e.g. main.
- PACKAGE_NAME: this is your projects bundle id e.g. com.companyname.appname
- UNITY_VERSION: set the specific unity version you want to use to build
- #slack-channel: if you use slack, you can be notified of build success/failure by entering a slack name here and connecting your Slack workspace.
This file instructs Codemagic to build the Unity project using the specified environment and builder version.
- Follow the code signing instructions found here to sign your application on Codemagic.
- Configure Unity licensing settings following these steps.
-
Ensure your project is setup correctly by following these steps.
-
Create a new script in your Unity project called BuildScript.cs. The build script should be created in the Editor folder in the Assets directory of your Unity project.
 using UnityEngine;
 using UnityEditor;
 using System;
 using System.Linq;
 using System.Collections.Generic;

 public class BuildScript
 {
     static string GetProjectName()
     {
         string[] s = Application.dataPath.Split('/');
         return s[s.Length - 2];
     }

     static string TargetDir()
     {
         return "Builds/" + GetProjectName();
     }

     [UnityEditor.MenuItem("Build/Build All")]
     public static void BuildAll()
     {
         BuildWindowsServer();
         BuildWindowsClient();
         // Add other platforms as your necessity
     }

     public static void BuildWindowsServer()
     {
         BuildPlayerOptions buildPlayerOptions = new BuildPlayerOptions
         {
             scenes = GetScenes(),
             locationPathName = TargetDir() + ".Server/Server.exe",
             target = BuildTarget.StandaloneWindows64,
             options = BuildOptions.CompressWithLz4HC
         };
         BuildPipeline.BuildPlayer(buildPlayerOptions);
     }

     public static void BuildWindowsClient()
     {
         BuildPlayerOptions buildPlayerOptions = new BuildPlayerOptions
         {
             scenes = GetScenes(),
             locationPathName = TargetDir() + “.Client/Client.exe”,
             target = BuildTarget.StandaloneWindows64,
             options = BuildOptions.CompressWithLz4HC
         };
         BuildPipeline.BuildPlayer(buildPlayerOptions);
     }

     static string[] GetScenes()
     {
         return (from scene in EditorBuildSettings.scenes where scene.enabled select scene.path).ToArray();
     }
 }
This script instructs the Unity editor on how to create a build and is called by Codemagic during the build process.
- Commit and push both the yaml and build script to your repo.
And that’s it! Whenever anyone emerges code into your main branch, Codemagic will now:
- Build for iOS and deploy to the App Store
- Build for Android and deploy to the Google Play Store
Remember, fine-tuning the setup will likely require further steps based on your specific project requirements. Happy coding!


Leave a comment